I was working towards getting some cards ready for the Stamping Royalty competition at Paper Crafts Magazine. Then I looked at the calendar. The cards need to be in the office by next Friday -- not going to happen! Because their rules say that the cards cannot be on any website or blog, I have not been posting as I complete them. So today, you get them all! I am going to submit them to The Stampers' Sampler "Feeling Themeless" catagory.
From the top:
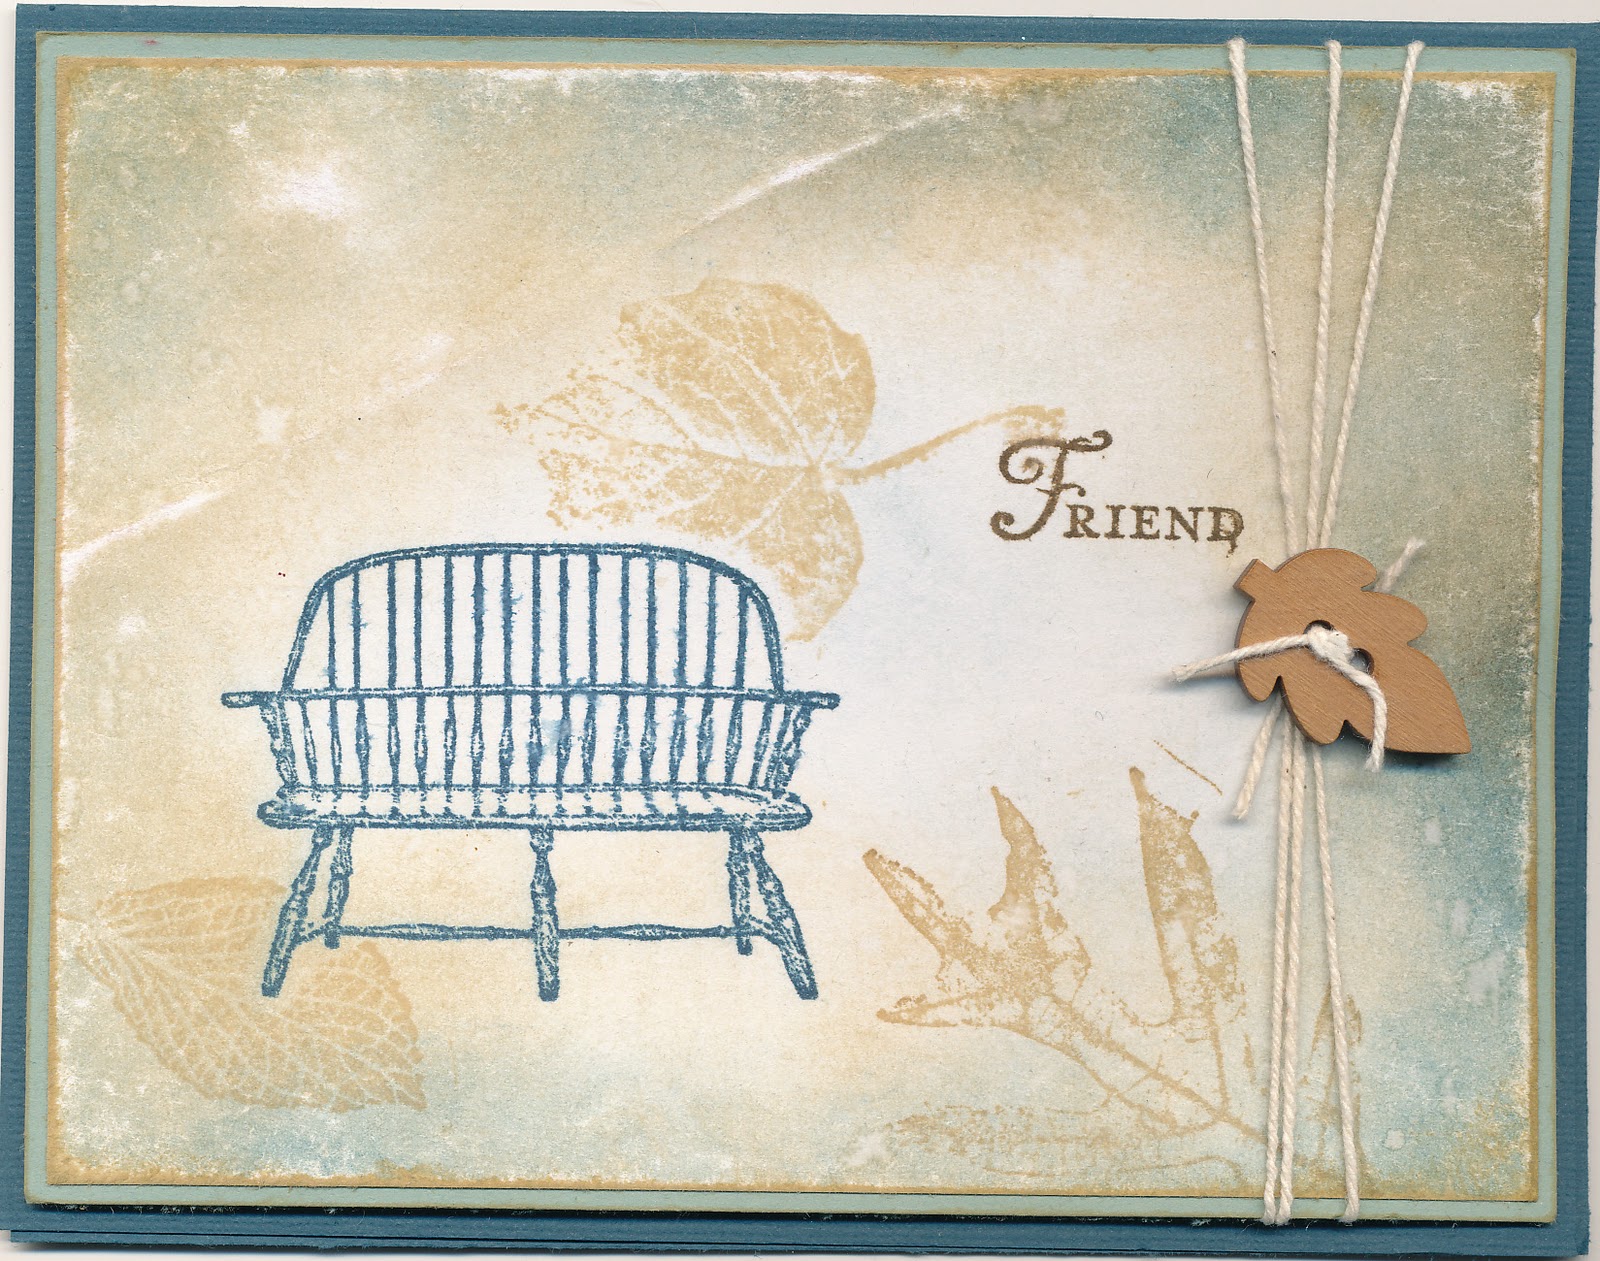
A Seat for a Friend
Paper: SU Night of Navy, Sage Shadow. Staples White c/s
Ink: SU Distressing Inks in Blue, Tea Stain, Early Expresso
Stamps: SU Have a Seat, You're a Gem
Accessories: cotton twine, wooden button
Spotlight Bird
Paper: SU Metallic Bronze. Staples White c/s. K and Co dp
Ink: SU Distressing Inks in Tea Stain, Soft Suede
Stamps: SU Nature Walk, French Foliage
Accessories: Staedler watercolour pencils. Waste plastic. Copper tape. SU Seam Binding ribbon
Enjoy
Paper: SU Very Vanilla, Natural
Ink: SU Blush Blossom, Certainly Celery
Stamps: SU You're a Gem, Charming
Accessories: SU ribbon, Cuttlebug texture plate, felt flowers (hand made)
Happy Bird-day
Paper: SU Very Vanilla. Staples White c/s. K and Co dp
Ink: SU River Rock, Crumb Cake, Kiwi Kiss
Stamps: Inkadinkadoo
Mask: Heidi Swapp, hand made dots
Accessories: Tim Holtz Tissue Tape, dollar store pearls, SU label punch


 I punched rows of eyelets, sewed the seam, added a drawstring (that's the orange seam binding) and filled the bag with ribbons. To use, I just pull!